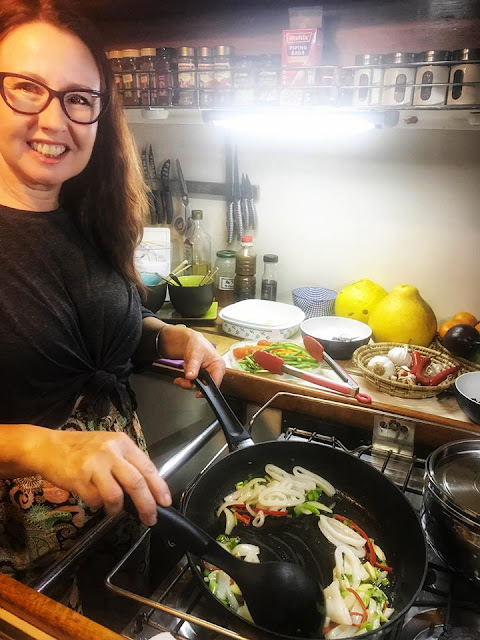
Cooking with Dutch Ovens and Enamelware on a Boat
We love our enamel cookware on Our Dreamtime. There are many reasons why.
Reasons to Love It
Enamel shrouds the underlying steel, preventing it from altering the flavour of your food. It’s also a great heat conductor, and the colours added during the enameling process are easy on the eye. Who doesn’t love a pot that you can match to your kitchen?
How to Cook in It
There aren’t a whole lot of rules when it comes to cooking in enamel, so mostly, you can stir and simmer away at will. It’s important to remember, though, that enamel is a bit too delicate for fast flashes of high heat. If you’d rather your pot live a long, healthy life, leave your intense searing for another pan in your arsenal. And, when starting your favourite stew, be sure the pot doesn’t go empty too long on your heat source -- this could result in it boiling dry, which leads to a damaged coating.

The 10 basic rules when cooking with enamel cookware
1. You should wash it first.
Before you use your Dutch oven for the first time, wash it in hot, soapy water, and dry it with a soft cloth. While many Dutch ovens are dishwasher-safe, it’s generally recommended to hand-wash it when you can.
2. Cast iron works on all heat sources.
You can use an enameled cast iron Dutch oven on the stovetop (whether it’s electric, gas, or induction), oven, or grill. It even works on coal- or wood-powered ovens. When you’re using your Dutch oven on a direct heat source, like the stovetop or grill, make sure that your temperatures are not too hot or you could scorch it. Which brings us to our next point.

3. High temps should be avoided.
“High heat temperatures should only be used for boiling water for vegetables or pasta, or for reducing the consistency of stocks or sauces,” says the Baccarat website. Dutch ovens works best when they slowly heat up and stay warm, so don’t preheat it on high. Heating one up on too high a setting can make food stick or burn since the heat is conducted so efficiently.
4. Cast iron holds in heat.
Cast iron gets very hot and distributes the heat evenly throughout the whole piece of cookware. Then, it stays hot — good news if you want to keep food warm for second servings (just keep the lid on), and also good to remember when you’re ready to serve at the table or bring it to the sink. Keep your oven mitts and trivets handy!
5. Cast iron gets cold, too!
The conductive properties in cast iron work both ways. If you put it in the freezer or fridge, the Dutch oven will retain the cold, so it can be a good option for, say, pasta salads and desserts, too. And feel free to put it right into the fridge once it has cooled if you need to store whatever you’ve just cooked. Just don’t move it straight from the stove to the fridge (or vice versa) as the sudden temperature change could crack the enamel!
6. Oil is important!
In general, you shouldn’t put food into the Dutch oven dry, as that can make it stick and burn. Use liquid, oil, fat, or butter to coat the bottom of the Dutch oven before adding whatever it is you’re cooking.
7. You can marinate food in it.
The vitreous enamel surface is not porous, so it’s safe to use with raw foods, and it’s tough enough to stand up to marinating with wine or acids.
8. You should be careful not to scratch it.
If you drop your Dutch oven, drag it across the countertop, or scratch it with a metal cooking utensil, you risk compromising the enameled finish. Generally, use silicone or wooden cooking utensils to reduce your risk of scratching. When you clean it, avoid abrasive cleaners or scrubbers like metallic scrubbing pads.
9. The accents might not be as heat safe.
If your Dutch oven has plastic, wooden, or other metal accents or handles, be sure to read up to the specs — while the cast iron can get super-hot, some lids or handles can only deal with lower temperatures before melting or degrading.
10. You’ve got to watch out for water.
Always let the Dutch oven to dry fully before storing it, and make sure to keep it in a cabinet or shelf that’s away from moisture, so that the iron doesn’t rust.
Here is a couple of Recipes that are well suited to enamelware
Dutch Oven Peach & Maple Chicken Thighs

Serves: 4
Time: 55 Minutes
Ingredients
2 tbs minced garlic, ( this was 5 cloves for me)
1/2 cup minced yellow onion
1 tbs olive oil
1 kg chicken thighs (no bones)
2 tsp sea salt flakes
1/2 tsp ground black pepper
1 tsp rosemary
1/2 tsp thyme
1/2 tsp Herbs De Provence - you can find Our Galleys Spice Blends Here
1/3 cup lemon juice
1/3 cup maple syrup
1 can of peaches
1 cup sliced mushrooms
3 carrots,peeled and cut into 2 cm pieces
1/2 of a peeled sweet potato, cut into 2 cm pieces
Let’s get Cooking
In a small bowl, mix 2 tsp sea salt flakes, 1/2 tsp of ground black pepper, 1 tsp of rosemary, 1/2 tsp of thyme, and 1/2 tsp herbs de provence together. Cover the chicken thighs in the seasoning and set aside.
Put the minced garlic, yellow onion, and 1 tbs of olive oil into a large dutch oven, and mix. ( I used a 3 quart large cast iron dutch oven).
Heat over medium-high heat for 3-4 minutes.
Place the chicken thighs into the dutch oven, skin side down and push them into the garlic and onion. Let the chicken cook for 5 minutes.
Reduce the heat to low- medium. Using tongs, flip the chicken over and top with 1/3 cup of lemon juice, 1/3 cup of maple syrup, the peaches, sliced mushrooms, chopped carrots, and chopped sweet potatoes. Cook uncovered for 6-7 minutes.
Then place the lid on top of the dutch oven and cook, covered for 30 minutes (note: half way through, spoon some of the liquid onto the tops of the chicken).
Remove the lid, cook uncovered for 5 more minutes.
If you find the sauce too liquidy, remove the chicken and most of the veggies and add some coconut flour to it.
Coconut Mussels
This dish is so easy to make, if you have a big crowd coming over for dinner it is a showstopper. It’s one of those share dishes that everyone will be fighting for the last mussel and drop of sauce.

Serves 2
Ingredients
1 kg of fresh Mussels
2 tbs of butter
3 garlic cloves minced
1 white onion diced finely
1 tsp of thyme
handful of fresh parsley chopped finely
6 chives cut finely
1 cup of dry white wine
300ml of coconut cream
To serve
Fresh parsley and chives, crusty bread always goes well with mussels to sop up the sauce but if you are wanting a low carb option try cauliflower fried rice.
Let's get Cooking
On low heat melt the butter and then add garlic, onion, thyme, parsley and chives. Cook until onion is clear but not coloured.
Clean mussels in cold water discarding any broken and opened shells. Add mussels and wine to pan and cover for 4 minutes on high heat. After 4 minutes add the coconut cream, stir, and let simmer for 3 minutes. Discard any mussels that have not opened. Scatter with fresh chives and parsley serve hot from the pan with either crusty bread, cauliflower fried rice, or steamed rice.
Saganaki Prawns with Tomato and Fennel

serves 4
Ingredients
1 large fennel bulbs, thinly sliced plus the fronds for garnish
5 garlic cloves, thinly sliced
3 tbsp olive oil
2 tsp cumin seeds, toasted and lightly crushed
2 tsp fennel seeds, toasted and lightly crushed
1 tbsp tomato paste
150ml ouzo
600g Cherry tomatoes cut in 1/2 (you can use tinned)
1 tsp caster sugar
2 tbsp thyme leaves, picked, plus extra for garnish
4 strips of shaved lemon peel
600g Green Prawns (I used prawns caught in Moreton Bay, peeled leaving tail and head intact)
1 cup of tomato juice
200g feta, broken into 2cm chunks
100 g of Mozzarella cut into 2cm chunks
60g unsalted butter
1 tsp chilli flakes
2 tsp lemon juice
Salt and black pepper
Let's get Cooking
Preheat the oven to 220ºC
In a large pan sauté the fennel and garlic in the olive oil on a medium heat for about 10 minutes or until softened. Add the cumin and fennel seeds and cook for another minute. Stir in the tomato paste and then add the raki or ouzo. Allow this to bubble away for a couple of minutes. Mix in the tomatoes, sugar, half of the thyme, the lemon skin, 1 teaspoon of salt and some black pepper and stir well. Simmer gently until the sauce thickens, 15-20 minutes, adding a little tomato juice if it goes much thicker than your typical pasta sauce. Taste and add salt and pepper accordingly. Remove from the heat and discard the lemon peel.
Season the prawns with salt and pepper and dot them inside the sauce. Press the cheese pieces around the prawns so that they are also slightly submerged in the sauce. Finish with the remaining tablespoon of thyme leaves. Place on the top shelf in the oven 8-12 minutes, until the fish is just cooked, the sauce bubbles nicely and the cheese turns golden.
Just before the dish is done, melt the butter in a small frying pan until it starts to foam. Add the chilli and cook until the butter just begins to brown. Pour in the lemon juice, stir and remove from the heat. Spoon this over the hot Saganaki as soon as it comes out of the oven. Sprinkle with the fennel fronds and serve hot with bread on the side.
You can find other wonderful recipes in the contents page
If you would like daily sailing inspiration follow us on Dreamtimesail or for the food we cook Our Galley
Affiliate Program Statement
The following site is Our Galley-Dreamtimesail MyStore. These are items we use on Our Dreamtime or have researched as items we think are brilliant for life onboard. Looking at these products is free. However if you purchase an item through this link we will get a small commission to help us towards our “Sailing Kitty“ dollars. We have tried to find the best prices for the quality products we use ..... who doesn’t love a bargain! Dreamtimesail-OurGalley MyStore


Comments
Post a Comment