Making Sushi
Homemade Sushi is so much cheaper than at the restaurant. Sushi is easy and fun to make at home, it's so easy Rob can make it! You can create your own by putting all your favourite ingredients into your perfect custom roll — here’s how!
List of equipment
Nori Sheets
Bamboo mat
Cooked and cooled sushi rice (directions below)
Filling ingredients there are so many combinations read on for all the traditional filling suggestions.
Served with
Soy Sauce
Pickled Ginger
Wasabi
Kewpie Mayonnaise
Japan is obsessed with mayonnaise—well, their version of mayonnaise, anyway, a brand called Kewpie. ... Kewpie is a little different than American mayo, because it's made with only egg yolks—not whole eggs—and with rice or apple vinegar and no added salt or sugar.
Suggested ingredients for your traditional sushi
Ebi: Prawn. You might also occasionally see ama ebi on the menu, which means raw prawn. You might also see it as sweet prawn.
Sake: Not the rice wine; it’s salmon. There is also toro salmon, which means fatty salmon.
Maguro: This is tuna, which appears bright red when raw. Maguro can also be chutoro or otoro, which refers to fatty tuna or high-quality fatty tuna.
Hamachi: Yellowtail. This fatty fish delivers a rich flavor and is less expensive than other fish.
Tako: Octopus. Tako is served raw or lightly boiled. The raw octopus pairs well with a bit of wasabi soy sauce, called wasabi jyoyu.
Aji: Mackerel. It pairs especially well with a bit of ginger. In fact, it is often served with a small amount of grated ginger and scallions on top. Dip it in soy sauce to complete the umami experience!
Ika: Squid. Ika nigiri is often served with a small piece of shiso leaf enhance the flavour.
Tobiko: These are the little fish eggs of flying fish that often appear atop a sushi roll in bright colors.
Unagi: Eel. Many people new to sushi shy away from the idea of eating eel, but once you try it, you’ll likely begin to appreciate it, also because it is a good source of protein. You rarely see raw unagi for sushi, it is usually cooked with glazing unagi sauce.
Tamago: Egg. Some sushi rolls contain tamago, but this is not a simple egg dish. It has been slightly sweetened with a bit of sugar, and is typically cooked in a special pan to give it a molded square shape.
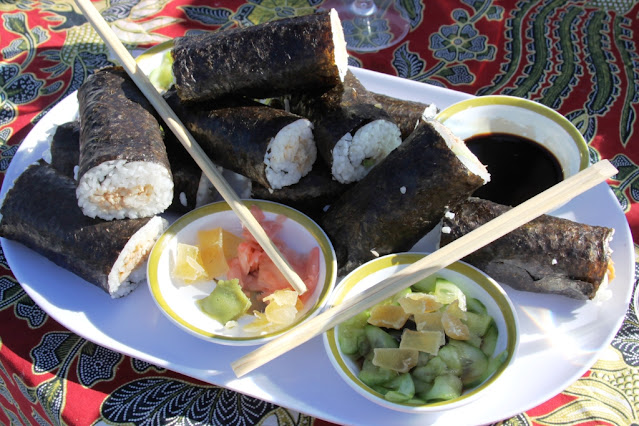
So if you really want to take your sushi making to the next level the above list is a great start to impress your guests over sundowners. Today however we are simply making them with fresh caught crab and avocado.
Making Sushi
To get started, you need the right kind of seaweed. These are the Nori Sheets I use.
Sushi Press. You can purchase a press similar to mine from here Sushi Press
However you can make make sushi without using a sushi making press.
Place the Nori Sheet shiny side down on the mat. Spread the Nori seaweed with a layer of Sushi rice and flatten gently with a rice paddle.
For my sushi this time, I have this gorgeous crab that Rob has caught fresh and Avocado that has just ripened. However sushi are great to make with pantry staples such as tinned salmon, tuna, chicken. But of course if you have fresh ingredients such as salmon, tuna, bbq chicken, avocado or any of the traditional ingredients you can’t go wrong. Really the combinations are endless.
Place your desired ingredients onto the rice 2.5 cm in from edge. Roll it up tightly, using a bamboo mat. It’s a specific kitchen item, but you can get a decent one for less than $6 from here Bamboo Mat If you don’t have one, you can use baking paper or plastic wrap, but you won’t be able to wrap it as tightly, so buy one if you plan to make sushi regularly. After practice you will find rolling it freehand becomes natural.
Chill your sushi for 30 minutes, this firms them up. Then use a sharp knife to cut the sushi roll into your desired size pieces. make sure to use a sharp one!
Cooking Sushi Rice
Now the rice is the most important part of the sushi making process, so it is essential that you get it right. Most people in houses now have rice cookers but No rice cooker in Our Galley? Here’s how I cook Japanese rice on the stove! These instructions should really be first!
Japanese short-grain rice is different from long-grain basmati or jasmine rice. So if you want to cook Japanese rice, please follow this simple method to cook a perfect pot of glossy and tender rice! Always soak the rice in water for 30 minutes. Rice has been sitting in the bag dried after milling, hence it needs moisture to revive the texture. It’s important that you give it enough time for rice to absorb water so that rice has a nice fluffy texture after it’s cooked.
DO NOT open the lid while cooking! That’s a big no-no when it comes to cooking Japanese rice. I learned from my experience to catch the indication of “boiling” by the sound. However, until you do, it’s okay to “quickly peek” inside to see if it’s boiling. The last 10 minutes of steaming is an extremely important part of cooking rice, so continue to keep the pot covered till the end and do not skip this step!
Use a heavy-bottom pot with a tight-fitting lid that keeps the steam in. If your lid fits loosely, put a clean kitchen cloth between the lid and the pot.
Ratio
1 cup Japanese Short Grain Rice
1 1/4 cups of water
Put rice in a large bowl. Rice absorbs water very quickly when you start washing, so don't let the rice absorb the unclear water.
Gently wash the rice in a circular motion and discard the water.
Repeat this process about 3-4 times.
Drain to a fine-mesh sieve and shake off excess water.
In a heavy-bottomed pot with a tight-fitting lid. (I use my Baccarat Pot it has a Heavy-duty Cast Iron core that provides excellent heat retention) put well-drained rice and measured water. Soak the rice for 20-30 minutes before cooking.
Close the lid and bring it to a boil over medium heat.
Take a quick peek to see if water is boiling (otherwise do not open the lid)
Once water is boiling, turn the heat to low and cook covered for 12 to 13 minutes, or until the water is completely absorbed (take a quick peek!). If you see there is water left, close the lid and continue cooking for a little longer.
Remove the pot (with the lid on) from the heat source and let it steam for another 10 minutes.
Fluff the rice with a rice paddle when it’s done. Chill the rice prior to making your sushi.
This is a great Sushi Making kit that really has all the equipment you need to make great sushi onboard Sushi Kit
Affiliate Program Statement
Keep in mind that we may receive commissions when you make purchases from our affiliate program. This is at no extra cost to you. However, this does not impact our reviews and comparisons. We try our best to keep things fair and balanced, in order to help you make the best choice for you. We will tell you if they are an Affiliate Link. Above are some of the services and products we recommend and have an affiliation with. Cheers Rob and Karen
F


Comments
Post a Comment